Logging in
After approval, you will receive an email with a temporary password that is valid for 60 days. Use this password for your first login.
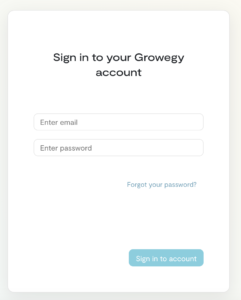
When you log in for the first time, you will be prompted to change it for security reasons. Once you have changed your password, you will be taken to your account.
Starting with Growegy AI
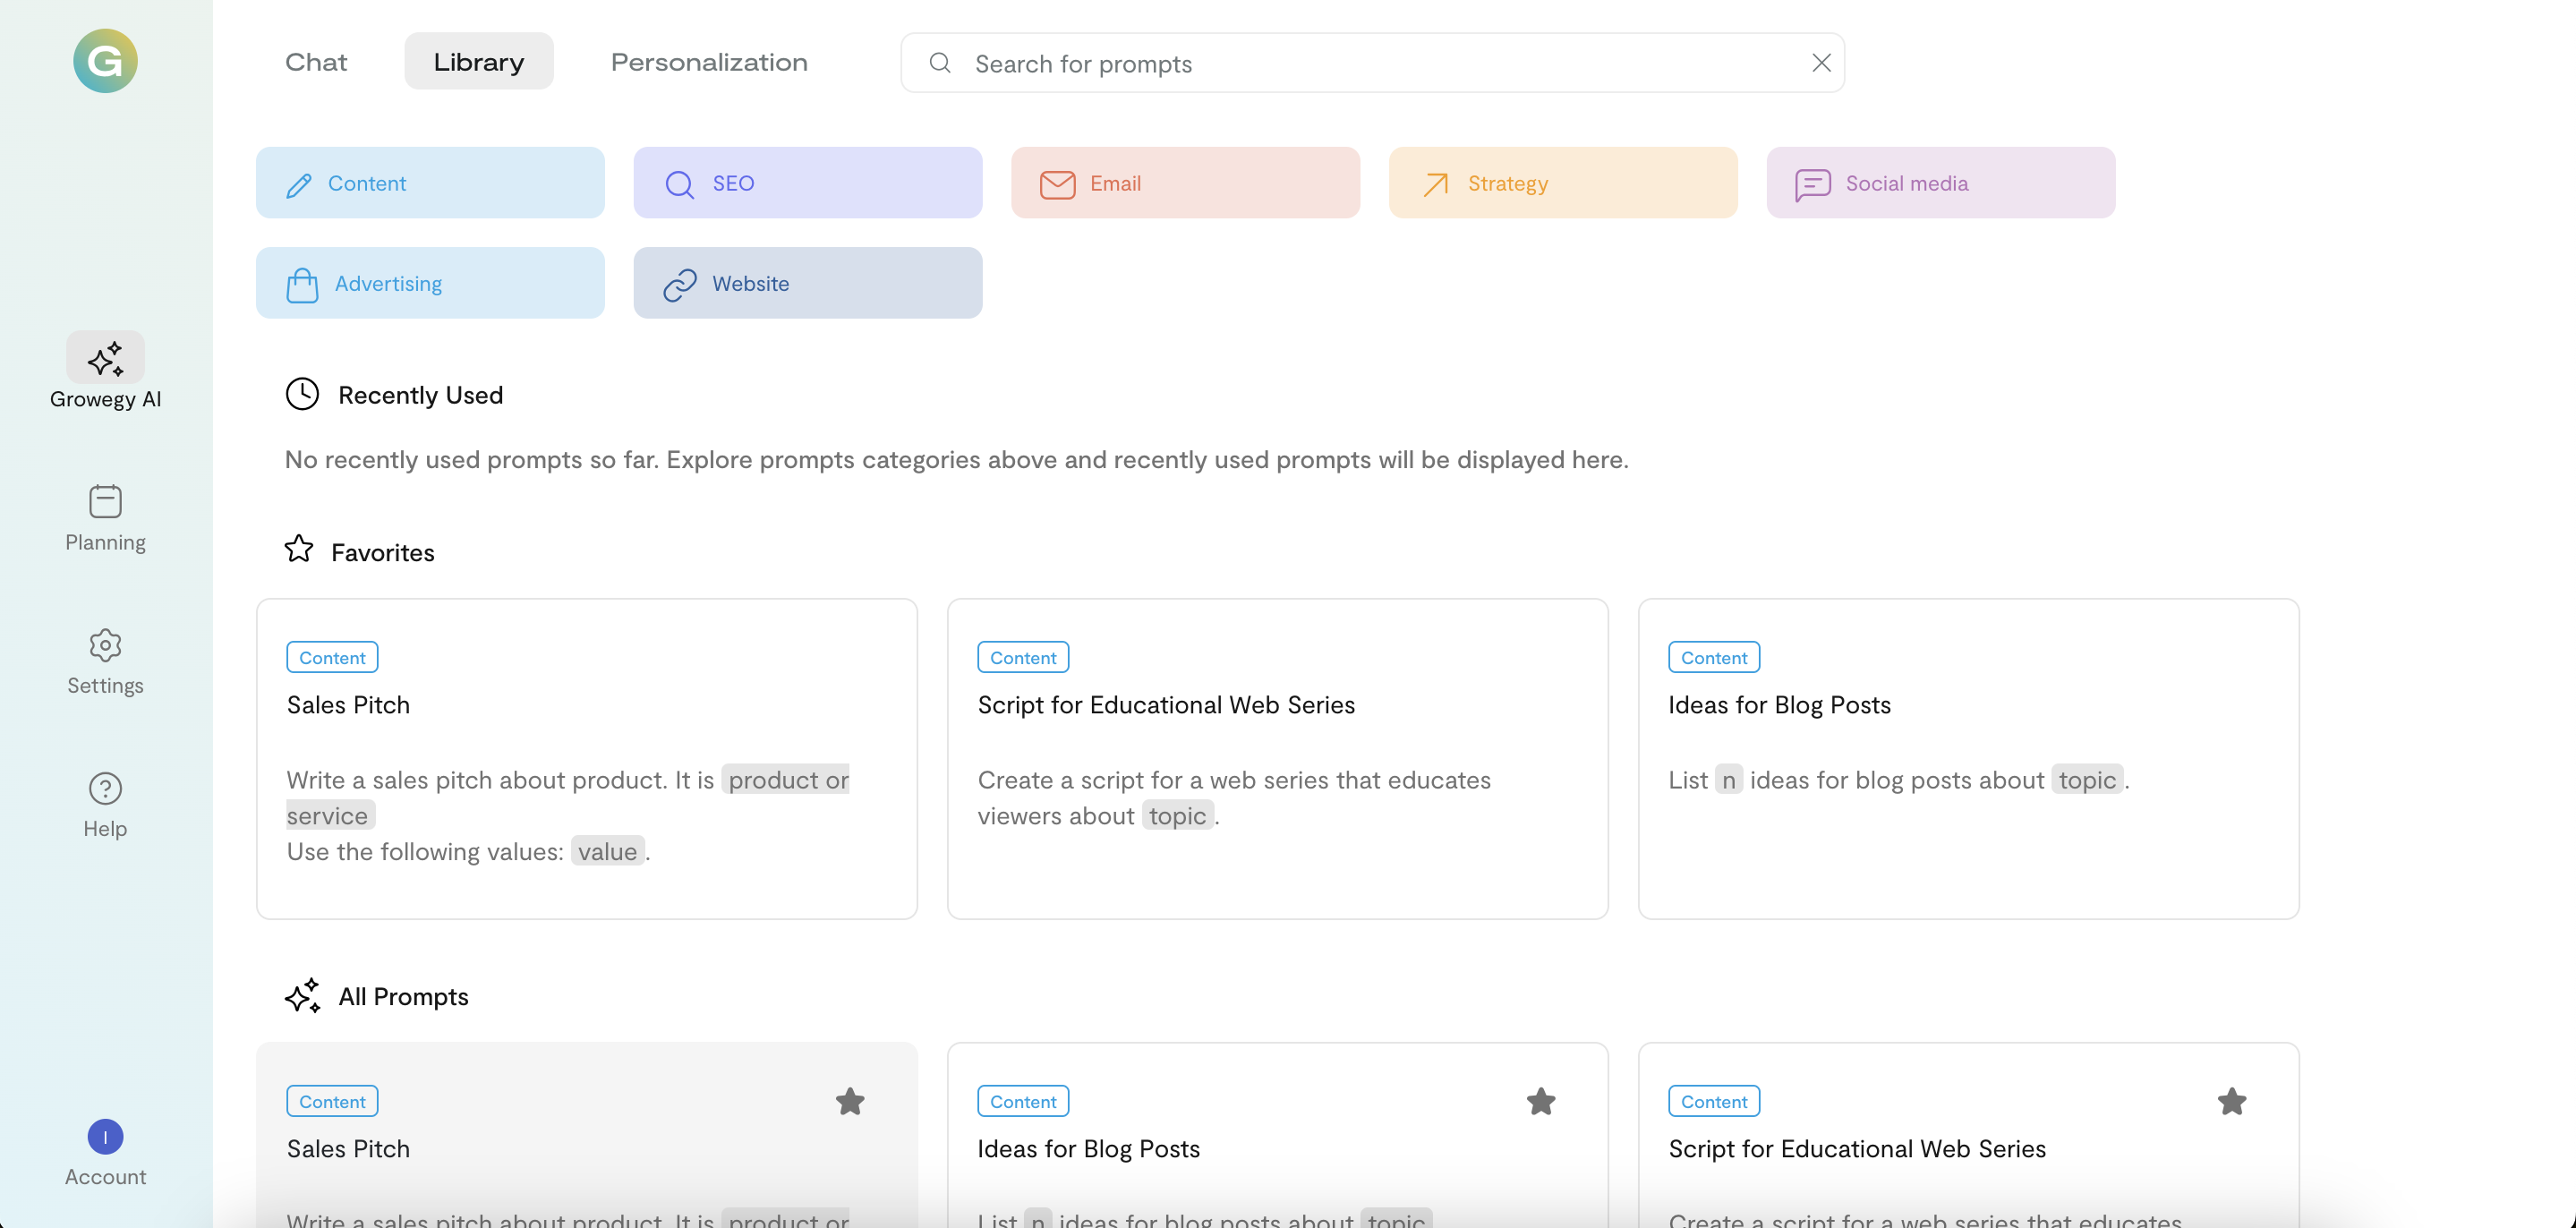
Upon logging in, you will be directed to the Growegy AI interface, which features three tabs: Chat, Library, and Personalization.
You can enter any questions or prompts into the chat to get information from Generative AI in seconds.
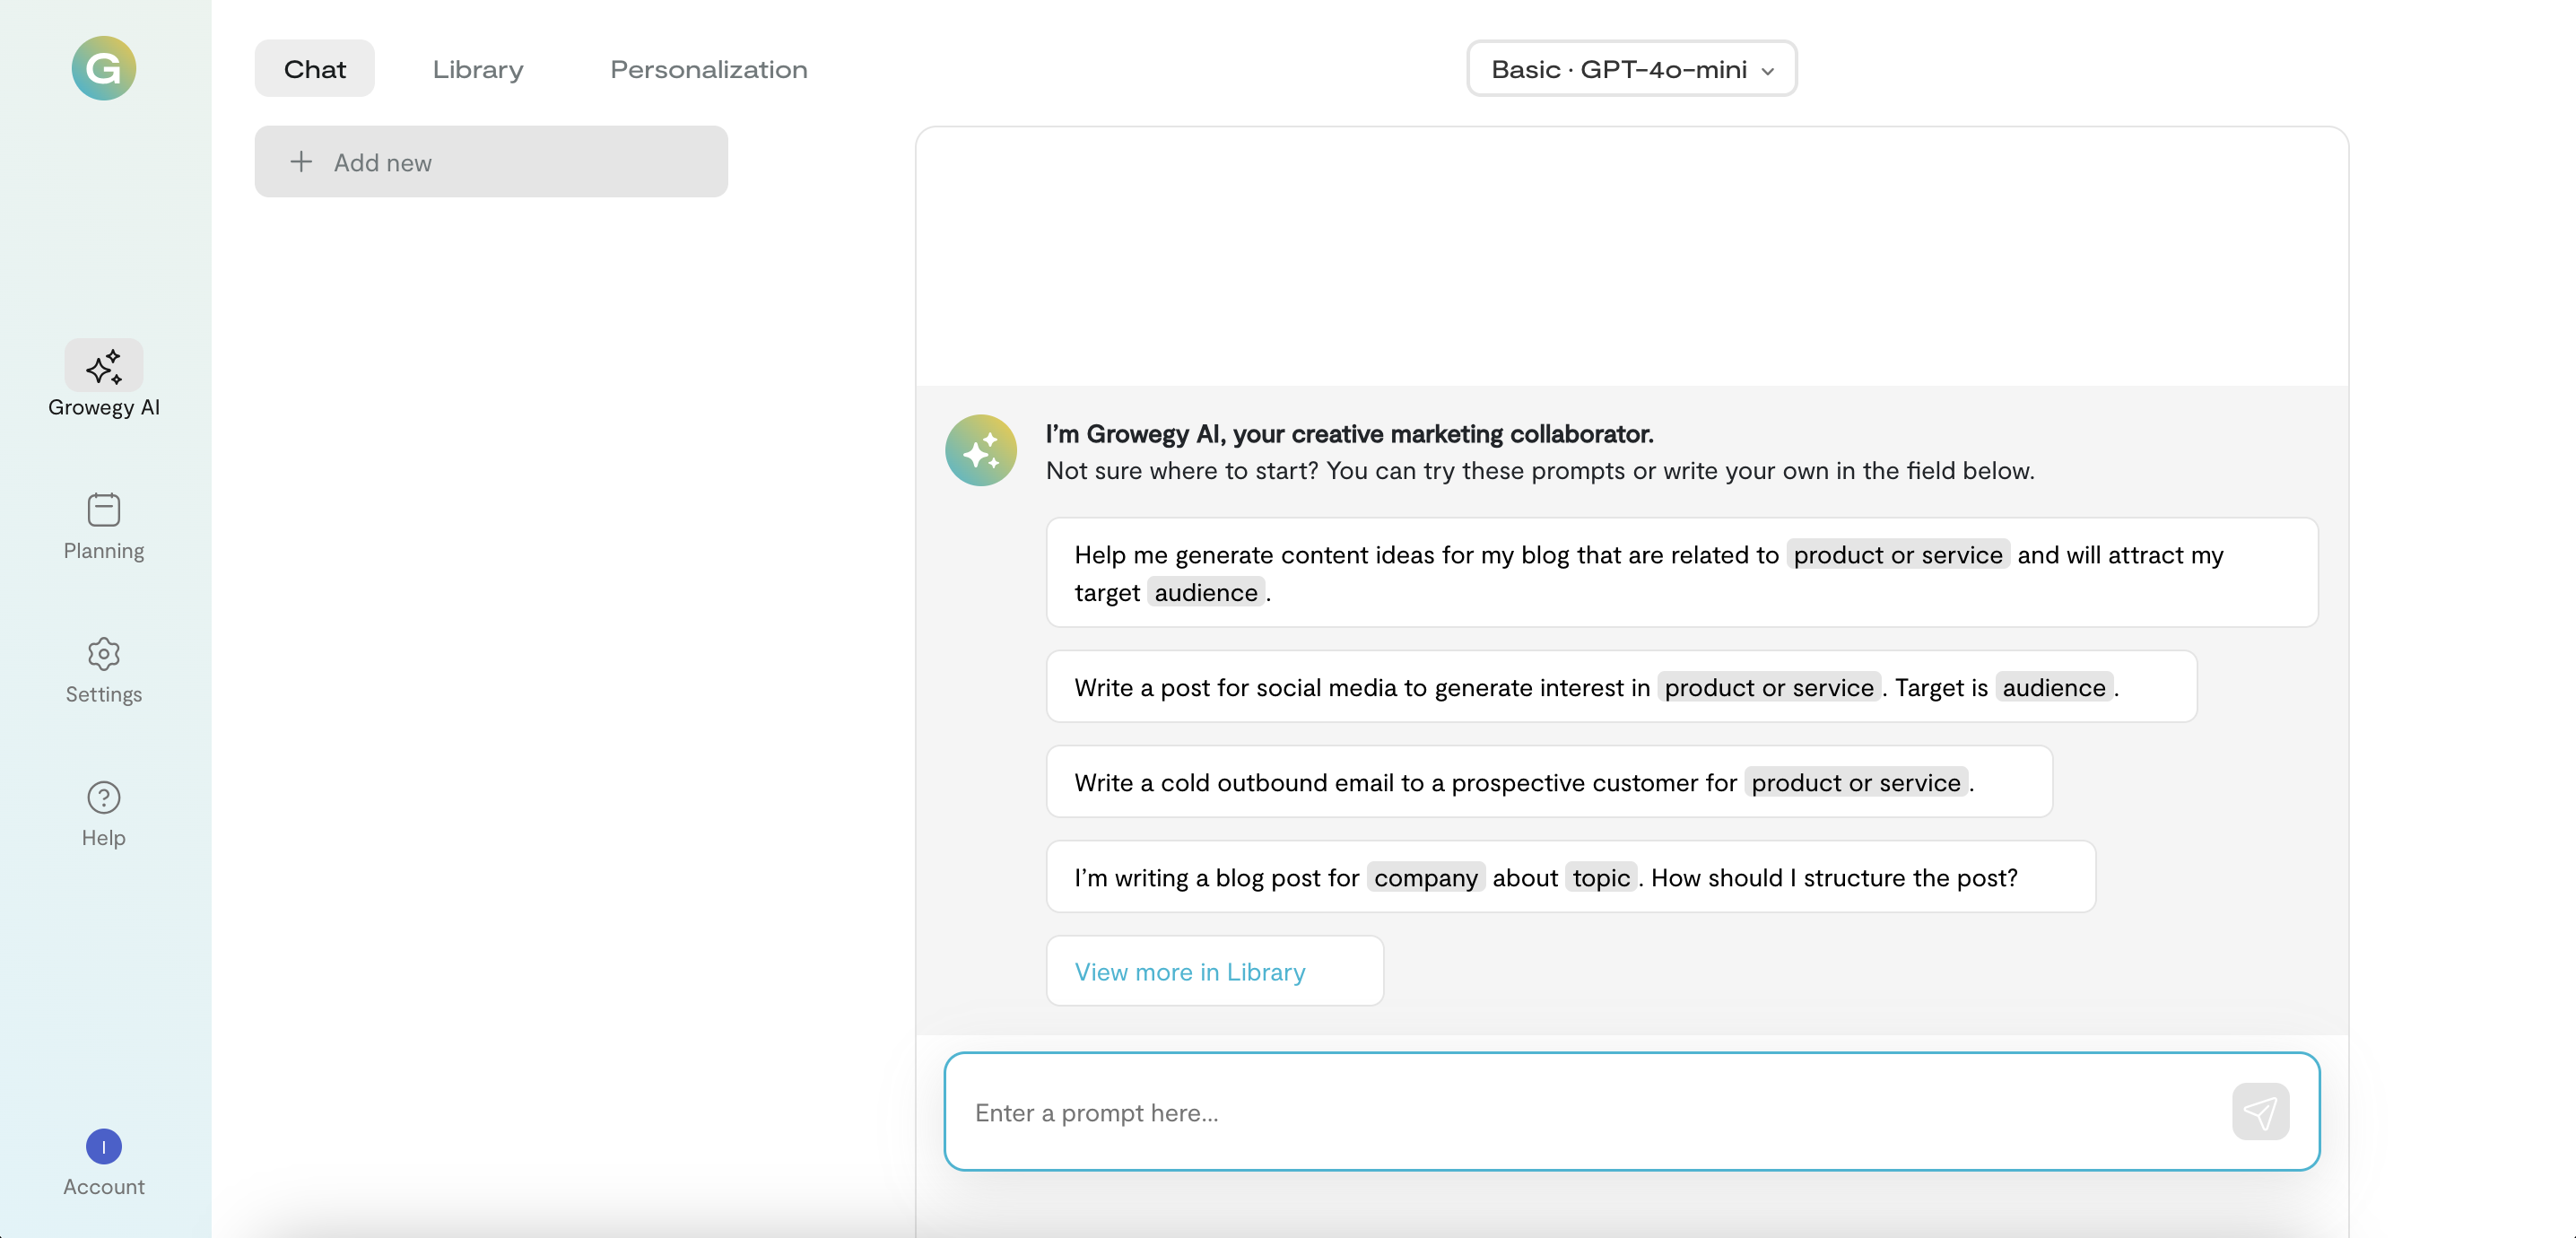
To get the best results, please provide relevant company-specific details. This will help generate more customized and precise outcomes.
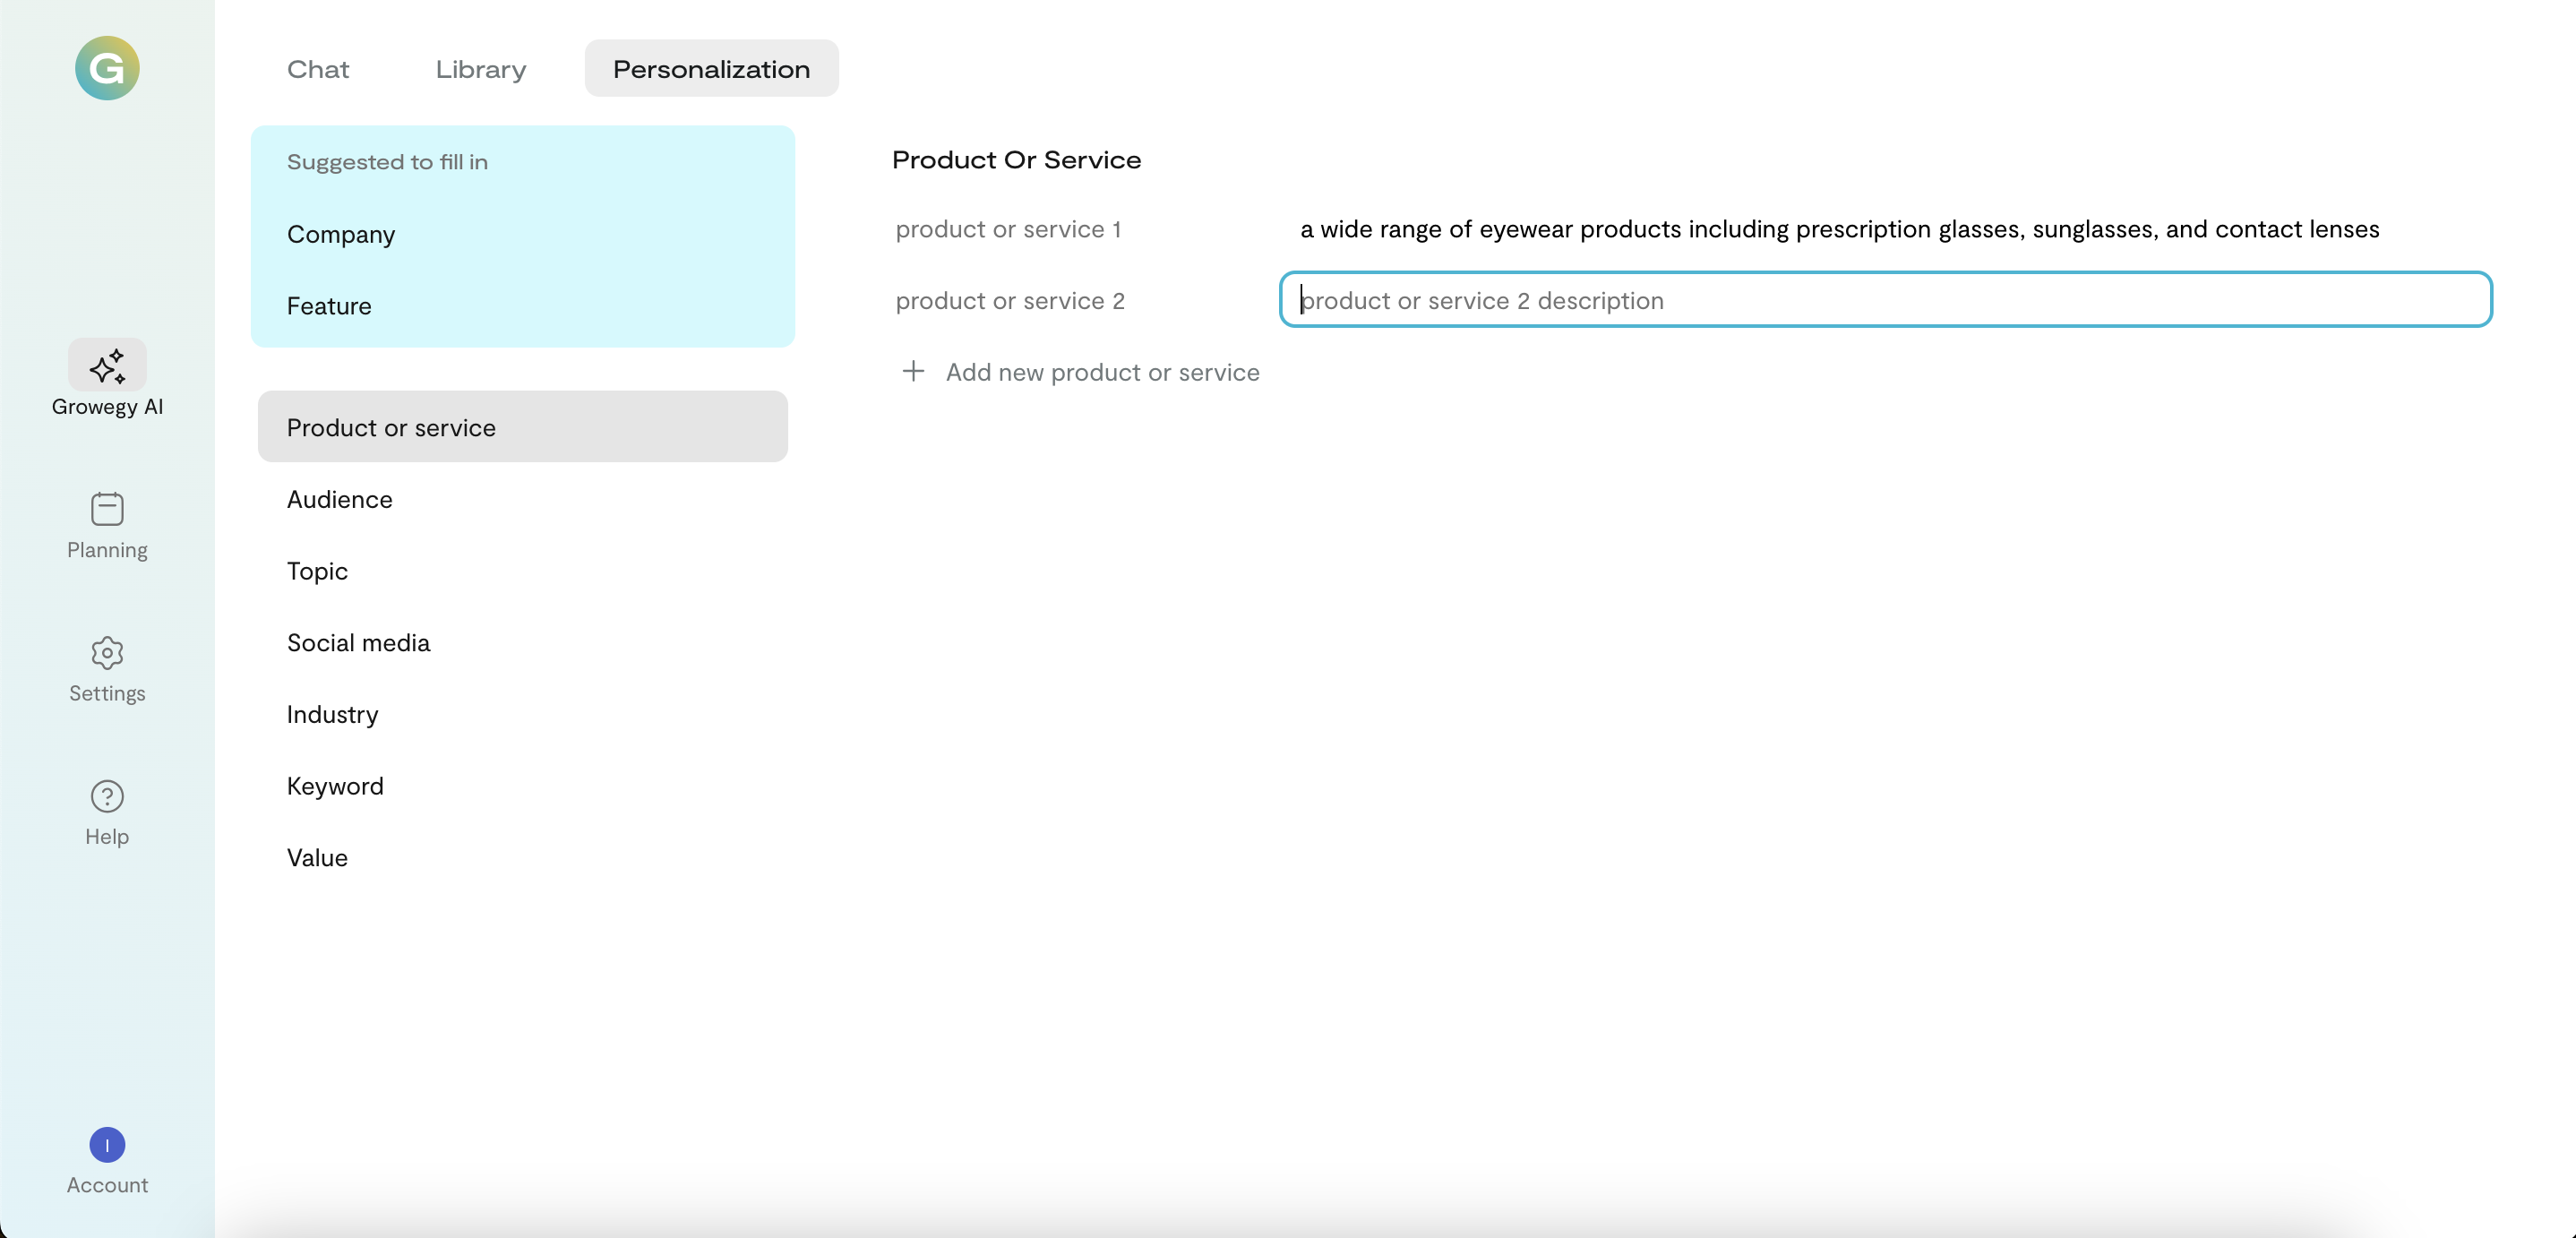
The information you provide (variables) will be saved in the Personalization tab for future use. You can edit existing details or add new inputs as needed.
The Library is a valuable resource for accessing prompts grouped by different categories. The Prompt Library is organized into various categories such as Content, SEO, Email, and more. Each category contains a curated list of prompts specifically designed to assist you in different areas of interest.
Planning
Planning has several views such as Calendar, Table and Analytics. Your first view will be the current month’s calendar. In the next step, we will add the first program and associate it to a larger campaign. However, we want to provide a quick legend on where some initial features live.
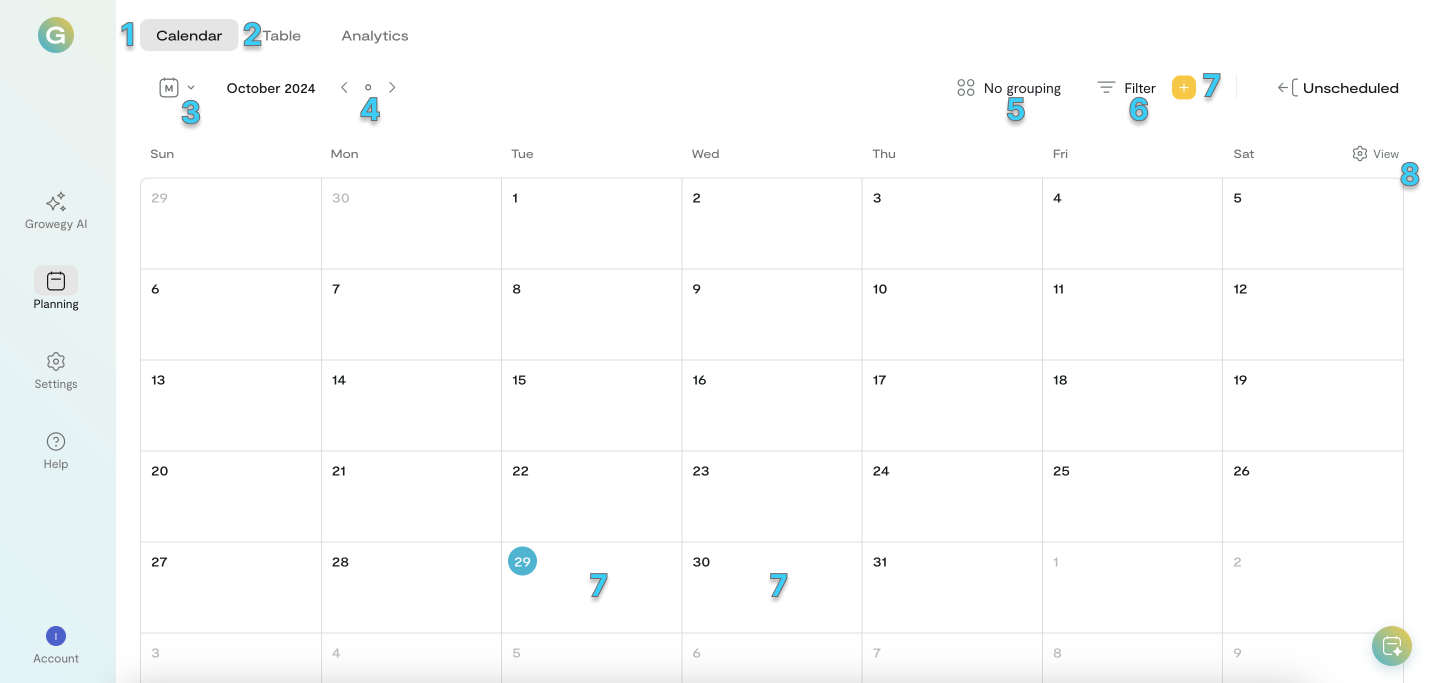
- Current calendar view
- Excel-style table view
- Time span (default: month, also available are the quarter, weekly, and daily views)
- Previous and next timeframe
- Grouping by campaign, not selected by default
- Filtering by any field
- Create a program or campaign by clicking in any location shown
- View selector, for more or less detail shown in calendar views
Adding your first entry
Create a new program card by clicking on any of the areas indicated in the image above labeled with a “7”. Let’s start with creating an example of a social media post for a small small business appreciation promotion. You should be looking at a card similar to the following image.
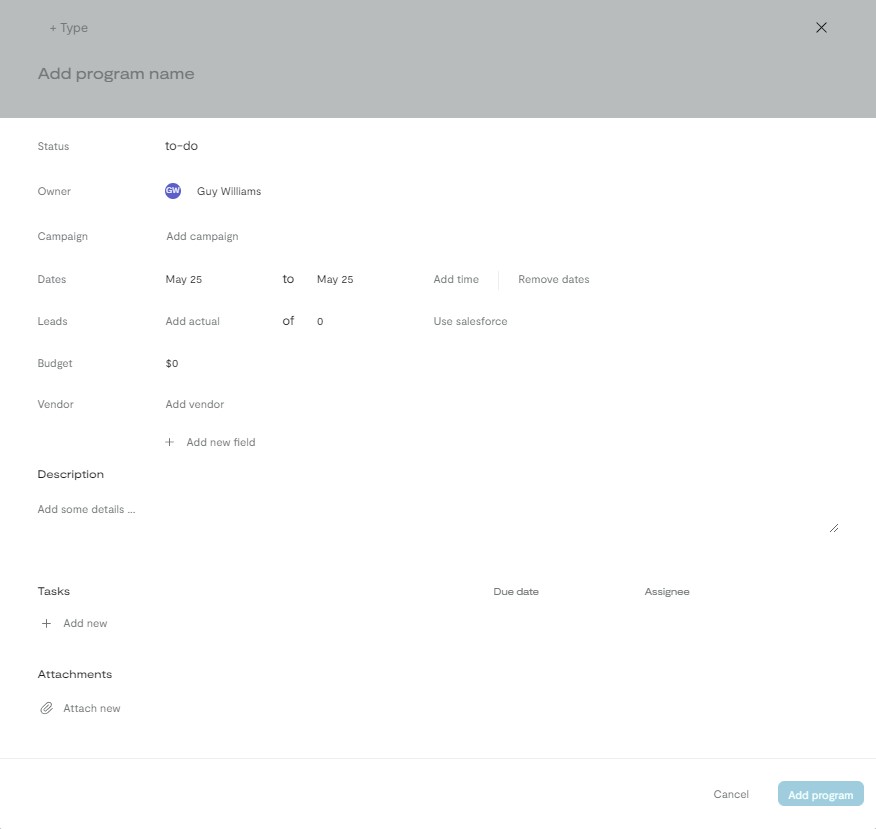
Growegy comes preloaded with a few different types of marketing tactics/sources (Email, Event, Social Media, Webinar, Website). You can always add more or change the default ones in the settings menu.
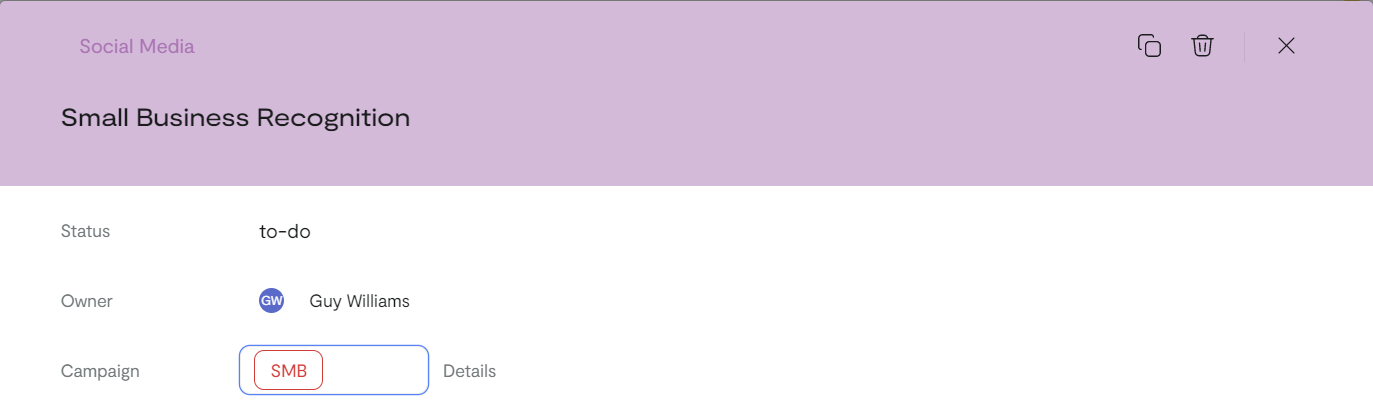
- Select “+ Type” and choose “Social Media”. You’ll notice that the header changes color. Each program and campaign has customizable color schemes and you can change these in settings later.
- Select “Add program name”. We added “Small Business Recognition”
- We left “Status” as “to-do” and the “Owner” field as the account owner since we haven’t added other team members yet. You would typically have the “Owner” be the person responsible for delivering the program.
- We will leave this program unassociated with a “Campaign” at this time.
- We will set the “Dates” to include pre-production of the post and the expected post date itself. In this instance, we set it for “May 27 to Jun 01”. No time is added for this program.
- We will skip a few fields and scroll down to “Description”, selecting “Add some details …” and adding “A shoutout to all our small business customers, providing them with a redemption for some free swag.”
- We now scroll a bit further to “Tasks”, selecting “+ Add new” and entering three tasks. One to write the content, another to design an image, and another to publish the content on LinkedIn. We select a “Due date” and “Assignee” for all three.
- We then scroll to the bottom of the card and select the button “Add program”
Completed program card
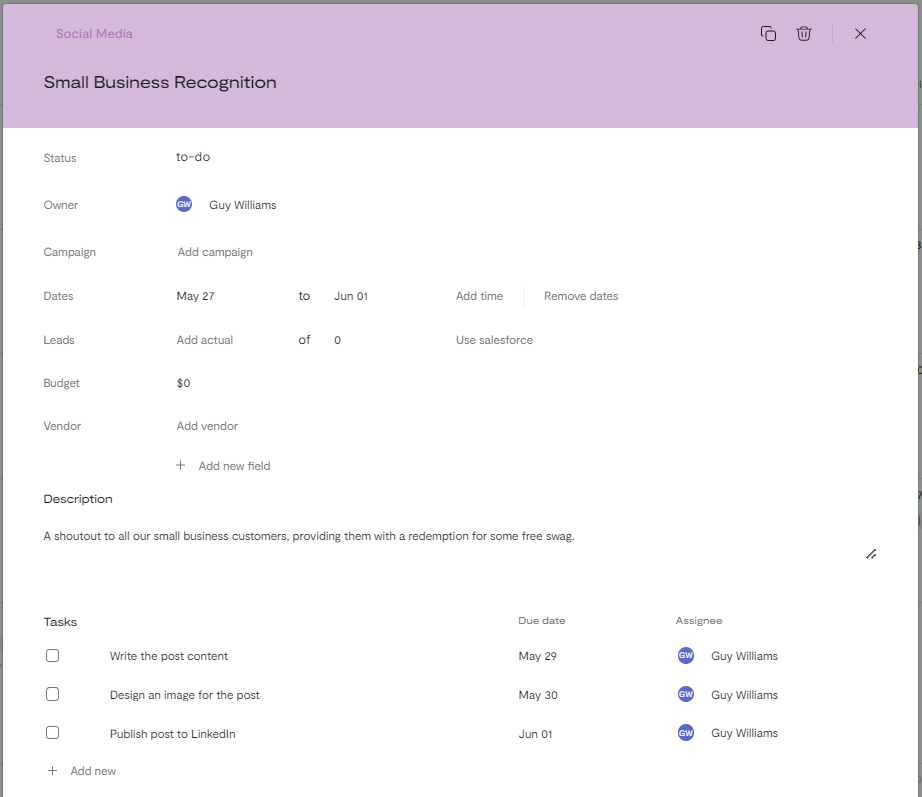
Congratulations! Your first program is on the calendar. Let’s next explore how the calendar and table look now.
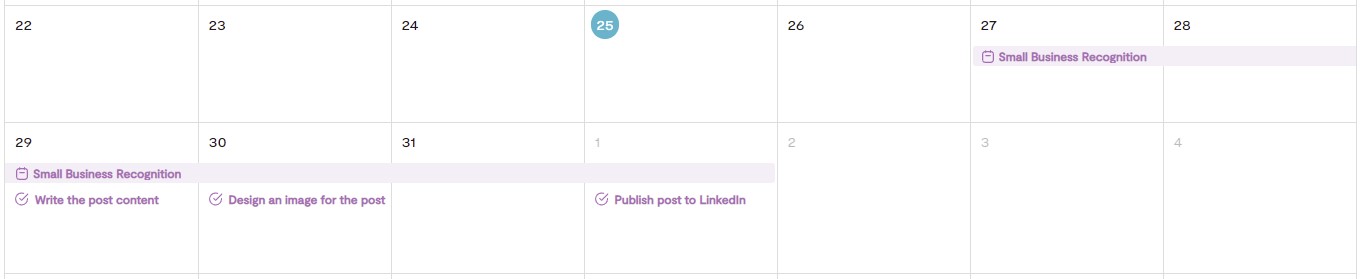
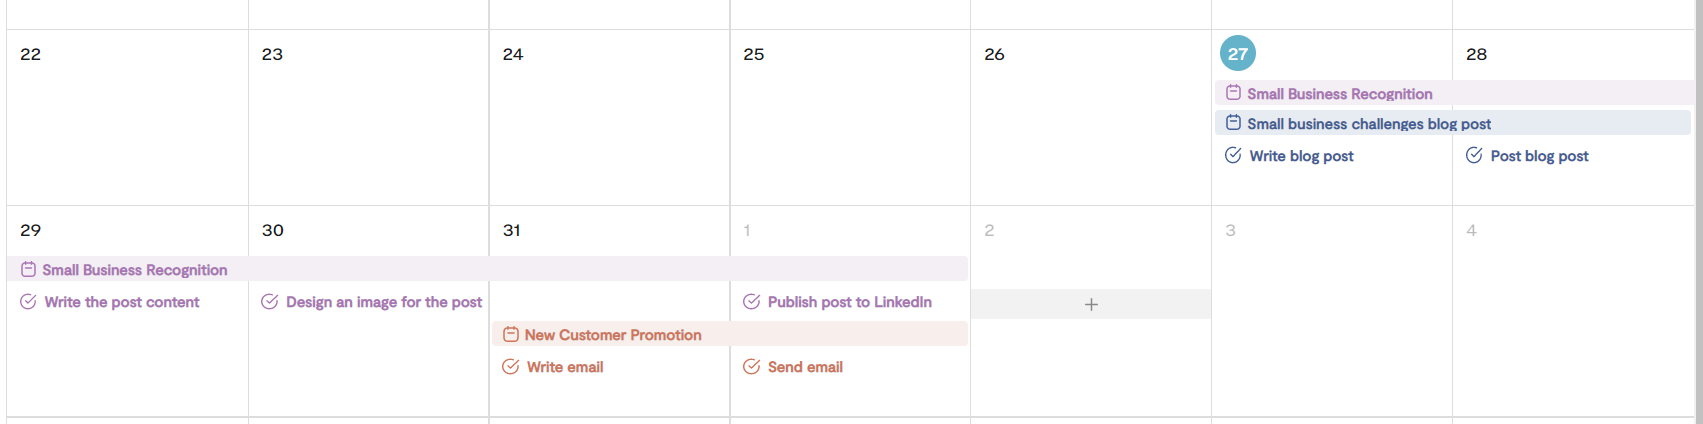
Monthly calendar view
The program and tasks we added are now displayed as we defined them.
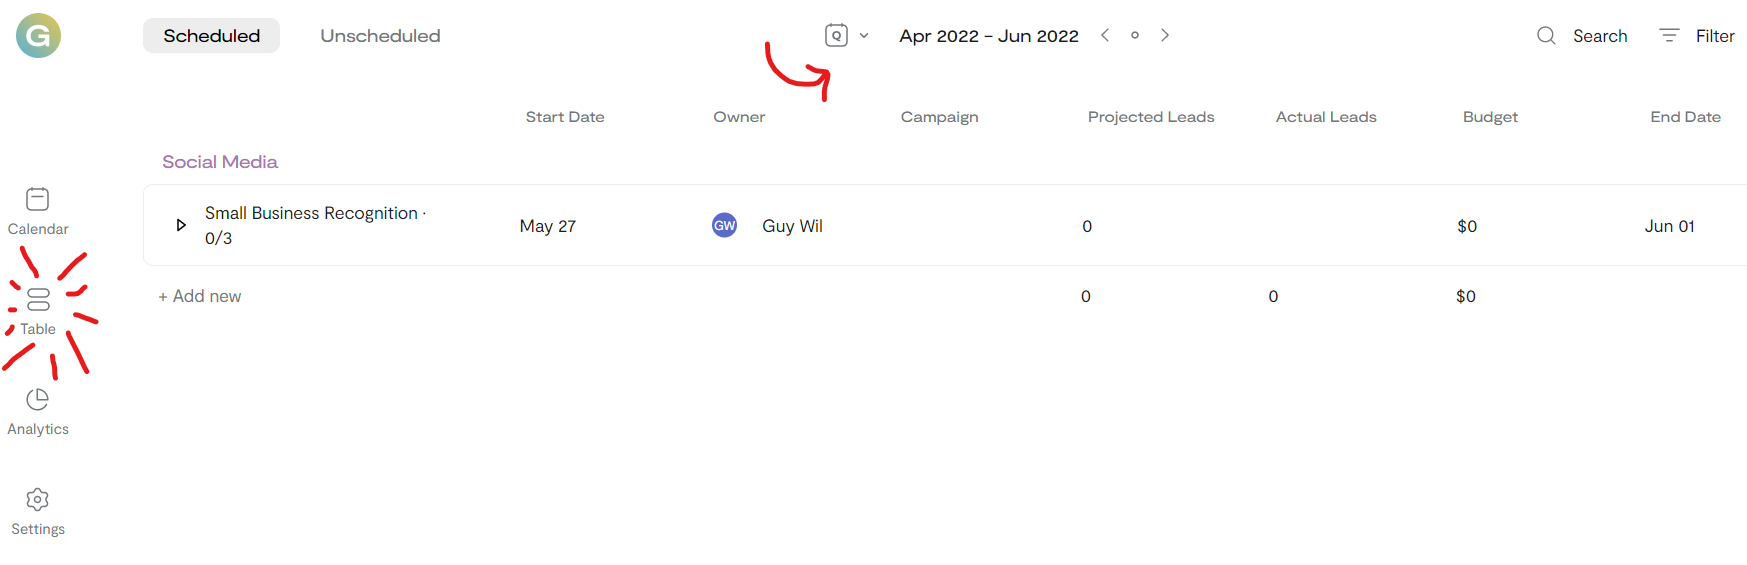
Quarterly table view
Selecting “Table” from the left menu we can see our program in place. The timespan is defaulted to a quarter view showing the month before and after the current month. You can change this view as well as the dates when you want to speak to and share programs, but the listed spreadsheet style will persist.
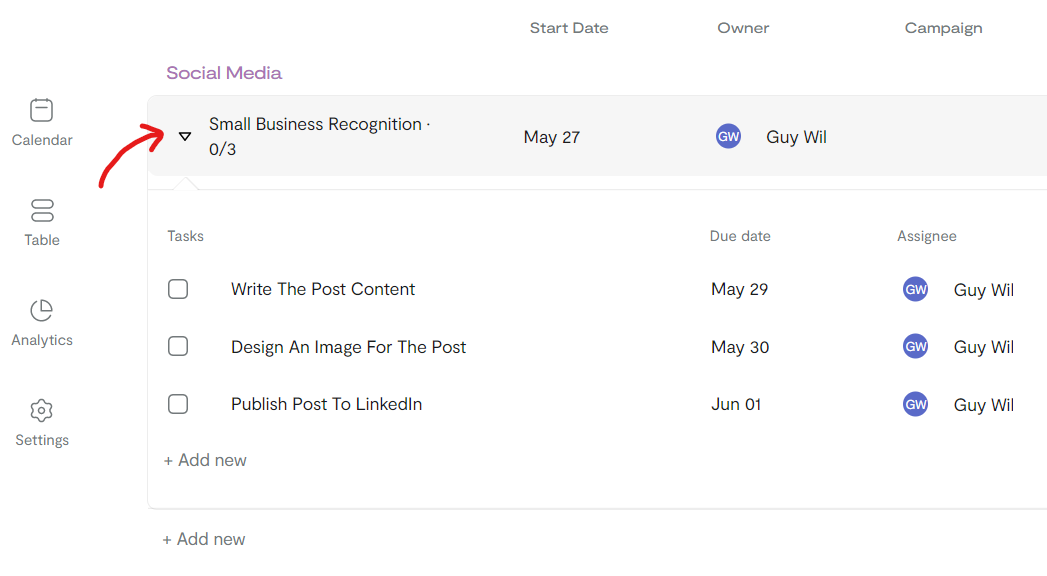
Tasks table view
Selecting the drop-down triangle next to the program name will reveal the tasks that are hidden under the accordion. You can fully interact and manage your programs in the table view directly.
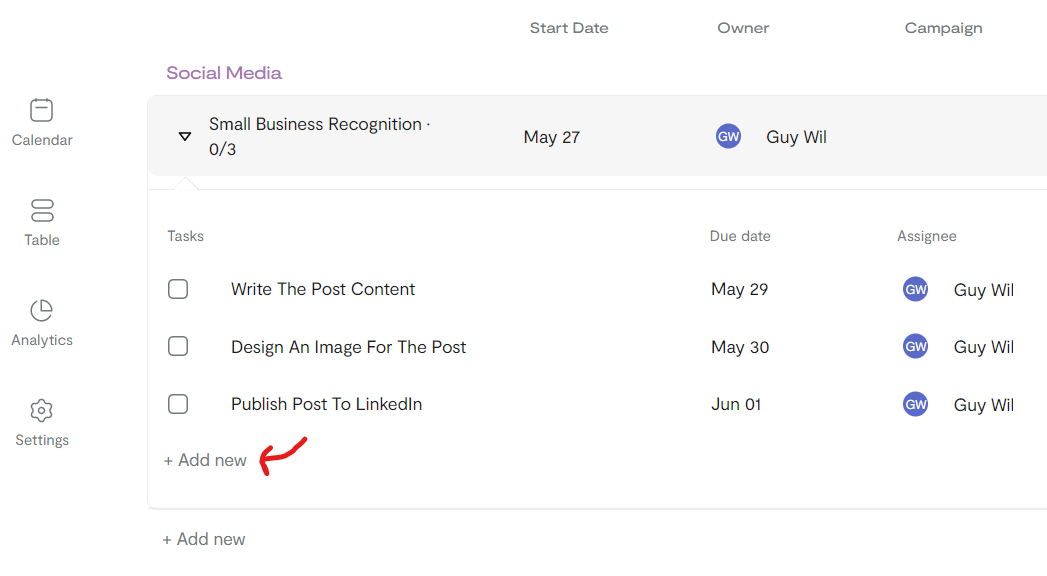
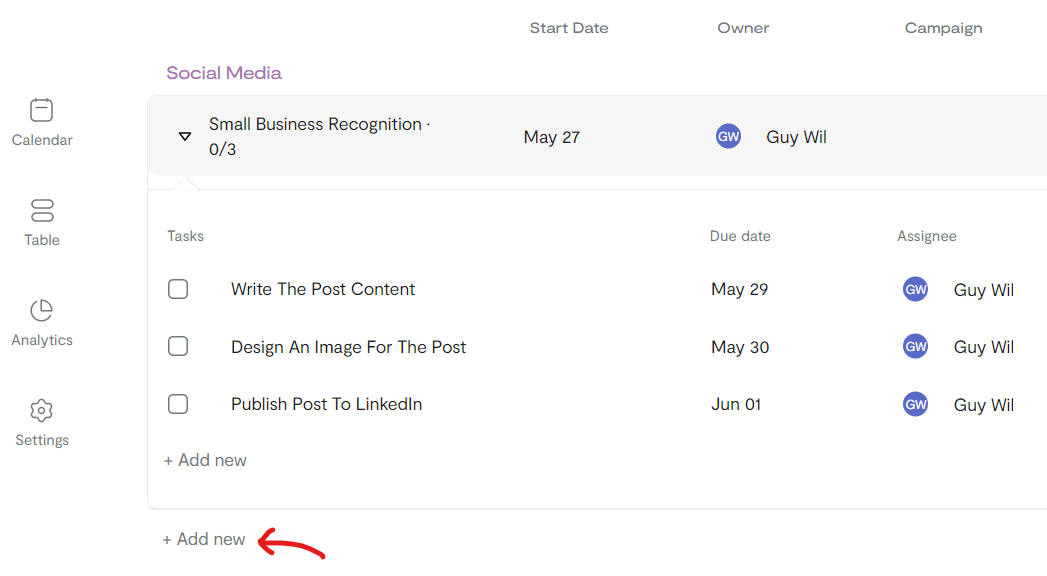
Add tasks table view
You can fully manage programs, and in this case tasks, in the table view as well. Just select “+Add new” in the tasks section. You can also edit any details of the existing tasks.
Add programs table view
You can easily add new programs in the table view as well. Just select “+ Add new” beneath the tasks section. This will open a new program card (the same card style as the calendar view presented earlier in this guide). In this case, it opens a program card with the “Social Media” type already selected. You can change the type as needed and all the details for your program. Pro tip: You can add a new campaign or program by selecting the yellow plus in the upper right corner on both the calendar or table views.
Adding campaigns and the difference between a campaign and a program
Campaigns are a grouping/collection or programs all thematically associated. Associating your programs with a campaign allows you to view them in a timeline and creates an omni-channel view of your promotional projects. This is the program view and we have added a few programs to illustrate grouping in the following steps.
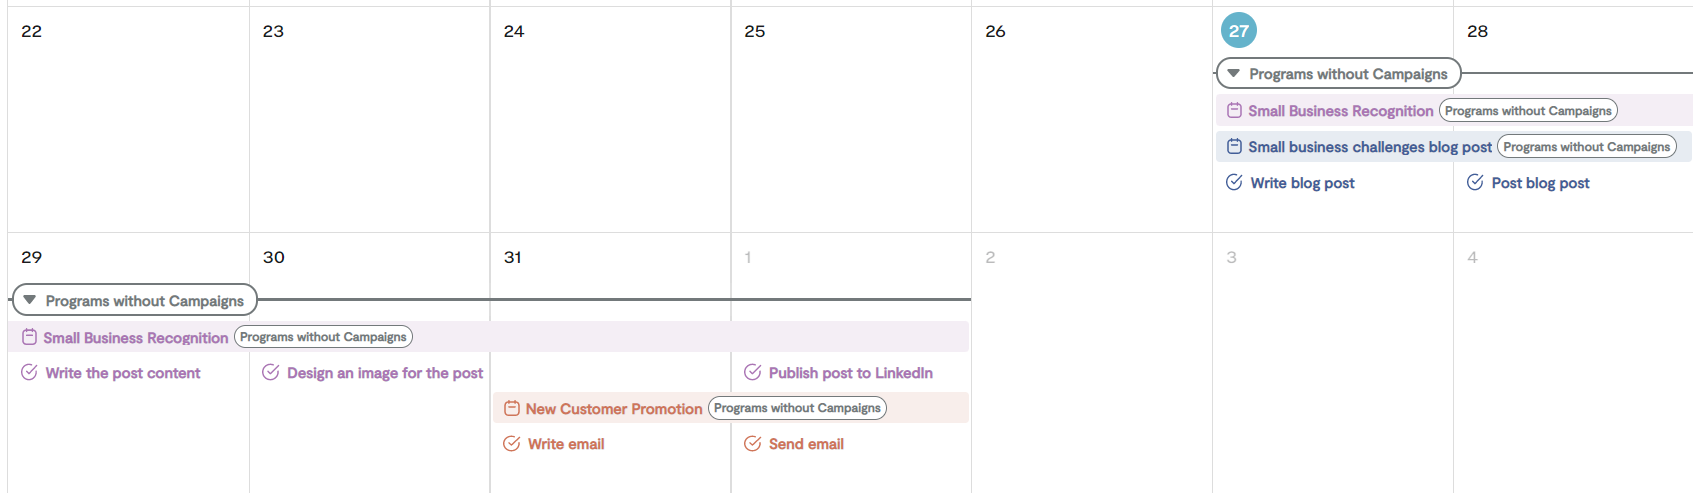
Campaign view (before campaign association.
If your programs have not been grouped into a campaign that you have added they are automatically grouped into programs without a campaigns category. This is hidden on the program view but you can see it by selecting the “No Grouping” selection and choosing campaigns (reference the legend, it is number 5). Below you’ll see what is displayed.
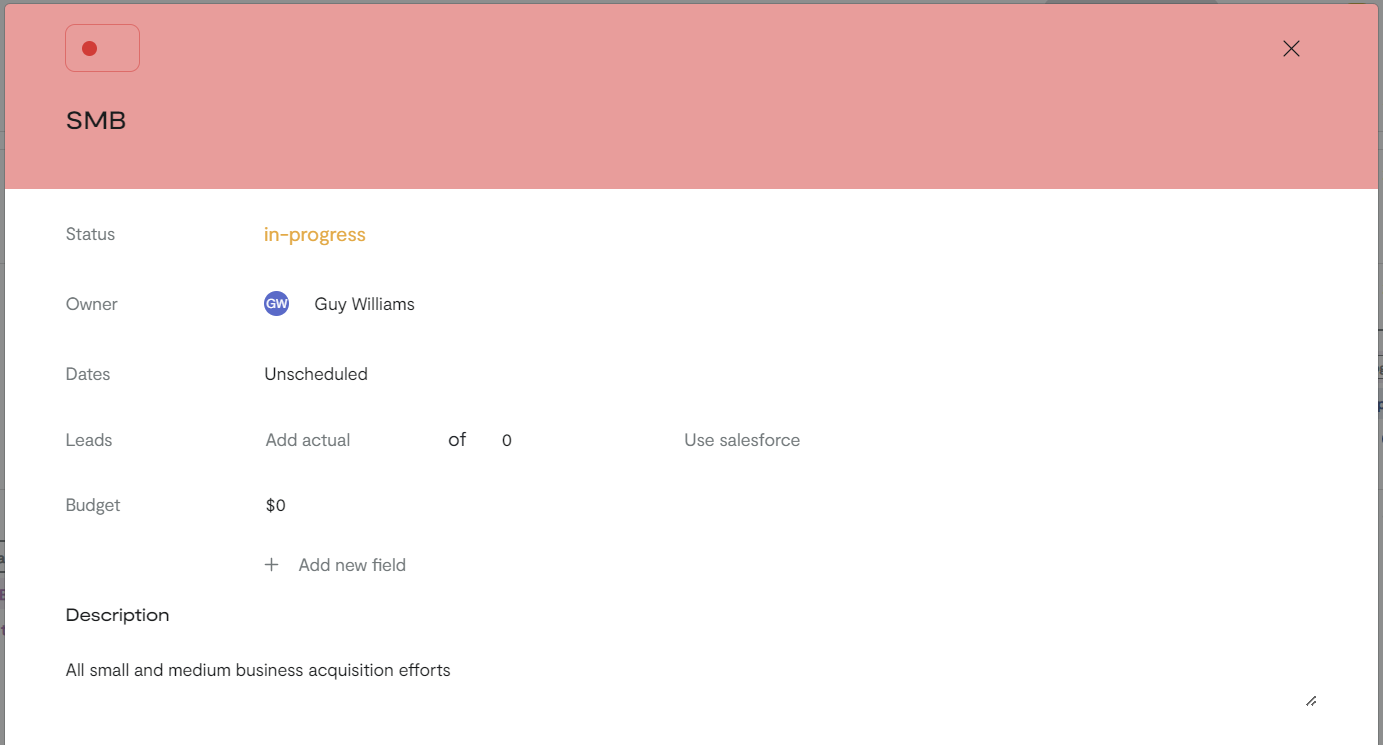
Adding your first campaign
Select the yellow plus sign (legend number 7) and add a campaign, it brings up the campaign card. Here’s what we added to the card. Color, we left the default as red. We typed “SMB”. Under “Status” we selected “in-progress”, we selected “Remove Dates” as the campaign will be ongoing and defined by the programs within. Finally, we added a description. Scroll and select the button labeled “Add Campaign”. The results should like this.
Add a campaign to your programs
Now we select each program and open the card. Under the “Campaign” field we select our only option at this time which is “SMB”. We repeat this for each program we added.
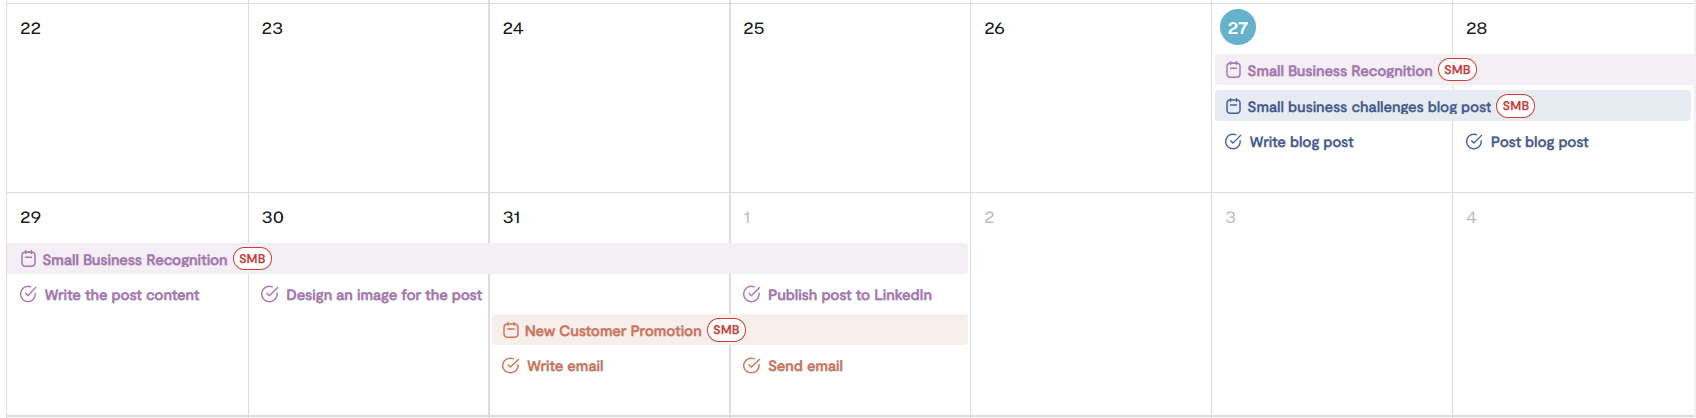
Calendar, programs view (no grouping selected)
Now when you view your programs you can see an added tag showing an association. This is particularly helpful when you have multiple campaigns running, especially on promotional tactics/sources.
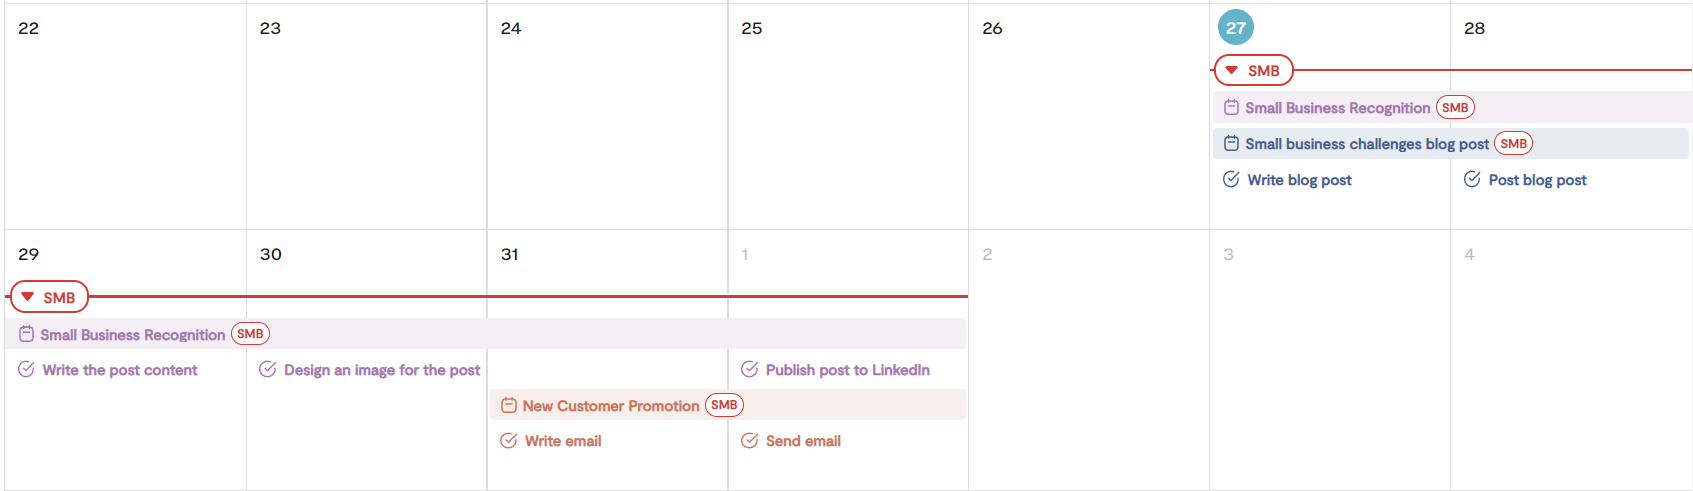
Default grouping view
When you choose to view your programs grouped you will now see by default the campaign with the accordion collapsed. It is absent other campaigns and stand-alone programs but this view amounts to a timeline and assists teams in reviewing internal capacity and prospect or customer saturation of programs. Brand teams have utilized this view and custom fields of demographics and messaging to understand the brand voice.

Expanded grouping view
Below you can see the campaign accordion expanded.
Custom fields and analytics
We will be uploading additional content to this guide as well as featured blog posts for how teams are using Growegy to coordinate and drive performance.